In real estate, sold listings refer to records of properties that have been sold and their transaction process has been completed. These listings contain information about properties on the market that buyers have now purchased. The agent took part in the transaction either on the buyer’s side (Buyer Agent) or represented the seller (Listing Agent). There are many reasons to display sold listings on your real estate website, some of which are references and analysis.
Other reasons are:
- Decision-making for buyers
Sold listings can be useful for prospective homebuyers in understanding the local real estate market. Analyzing data from sold properties can help them gauge whether they are getting a fair deal or how much they should be willing to offer for a property they are interested in.
- Building trust and credibility
Including sold listings on a real estate website or agent’s profile can establish trust and credibility with potential clients. Demonstrating successful transactions and showcasing satisfied buyers and sellers can reassure visitors that the agent or website has a track record of delivering results.
- SEO benefits
Maintaining and regularly posting sold listings can have SEO benefits – fresh content and consistent updates can improve search engine rankings, increasing visibility and attracting more potential clients.
- Client engagement
Featuring sold listings on a real estate website can increase user engagement and keep visitors on the site longer. Potential buyers are often curious about recent property sales in their desired area, and displaying this information can encourage them to explore more listings and potentially contact an agent for assistance.
- Comparative Market Analysis (CMA)
Real estate agents use sold listings to create CMA reports for sellers. They help understand how their property compares to recently sold properties with similar features, allowing them to make informed pricing decisions.
Requesting a sold listing display through the Placester App
Real estate agents are busy people – you must act quickly and be on the move, with no effort spared, to stay productive and ensure your clients get what they need. Placester App is created explicitly for agents who aim to maintain high productivity in and out of the office. This mobile application enables you to manage your entire website efficiently from a smartphone, providing convenience and flexibility on the go. Many clever features help to streamline work:
You can order unlimited changes to your website, track tasks in progress, send the request as a task for property landing pages, import testimonials, chat with Placester’s Experts, and request content updates for Do It For Me plan users.
One of the great mobile features is the possibility of requesting Sold listings feed directly through the app. This functionality is available in Do It For Me (DIFM) and DIFM + Content packages. Having your sold properties displayed shows clients your success rate and helps establish credibility and trust in your work.
When you’re on the Do It For Me plan, ask a Creative Assistant to do all the work. Once the team gets feed to your website, all components showing your Sold Listings will be updated automatically.

How do you request sold listings through the app?
Placester supports sold listings natively – you don’t have to do anything. Requesting them to have your feed with sold listings visible is enough.
- Log in to your Placester account and go to the Dashboard.
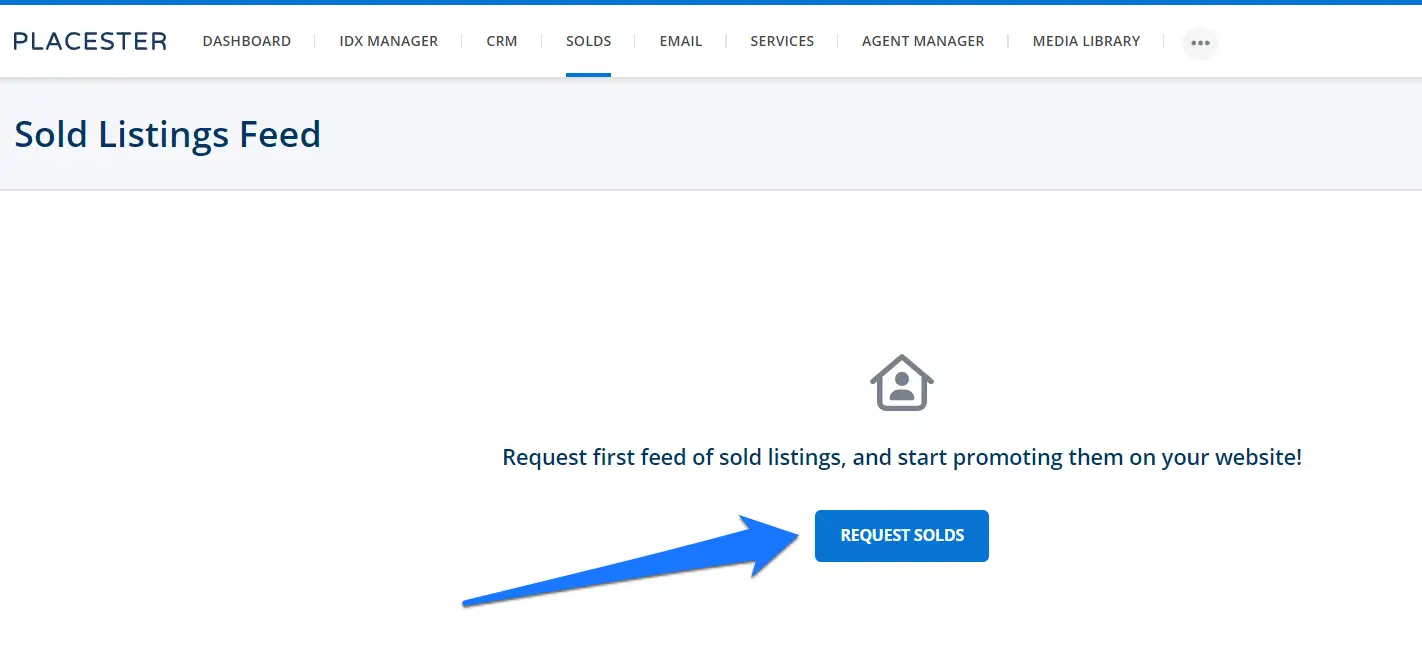
- To request the sold listing feed, click the “Solds” tab at the top of the page.

It will then bring you to the sold listing feed page, where you can request your sold listings feed by clicking the request sold button.
- Name the feed, select your MLS, and enter the email address used in your MLS membership.
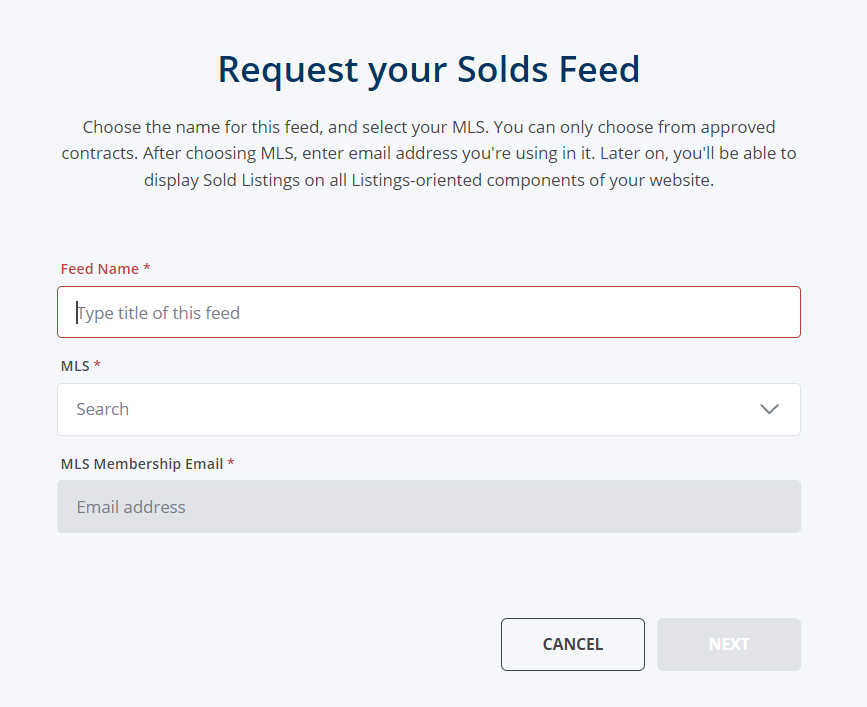
If you have multiple approved IDX integrations, the sold listings page will only show MLS that are supported to show sold listing feed.
Placester doesn’t support sold listing feeds to all MLS, just those using WebAPI. There are 198 such MLS (check the full list of supported MLS), but this number grows as more MLS migrate to WebAPI.
Data from MLS is updated daily every hour, which means that after requesting your Sold Listings, feeds will be updated automatically. So, whenever we see a new listing marked as “Sold” in your MLS, it will be visible on your website in no time!
That’s not all! At Placester, we save all the relevant data on your past listings so your site visitors can click on them and explore their detail pages. It’s the ultimate testimonial of your hard work and the best way for Buyers and Sellers to see your work history.
This feature is free for all customers using MLS Feeds, where we support Solds.
If you are an agent
You will be redirected to a page where you must add your Member ID or MLS agent ID.
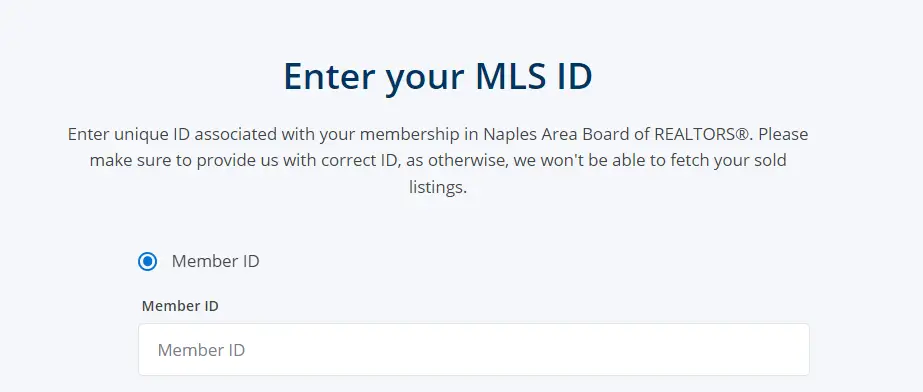
If you are a broker
You will have the option to add your MLS agent ID or your MLS office ID. Once you are done adding your ID, you can click the request feed button.
Note that office ID requests are only available to brokers when they want to display their agents’ sold listings.
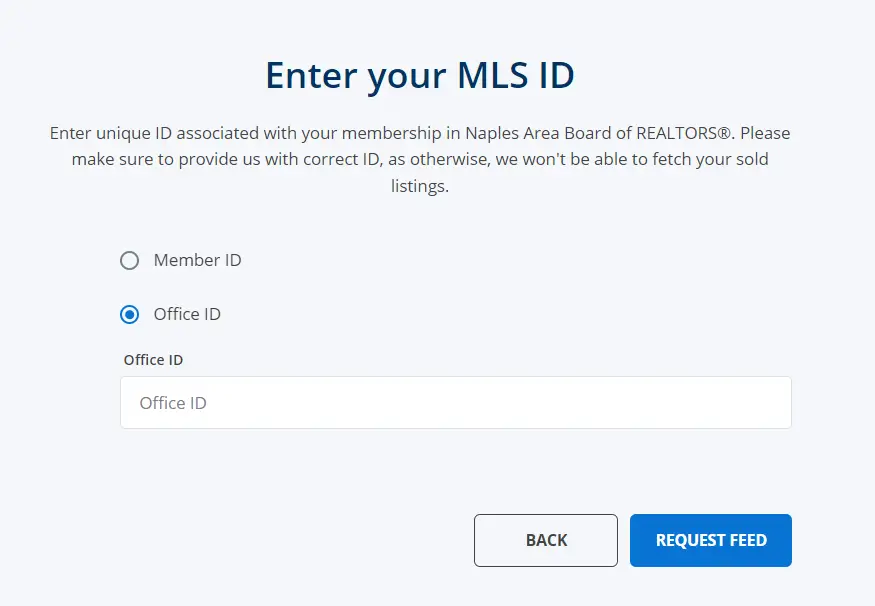
After requesting the feed, it will automatically generate your sold listings. You don’t need to do anything else – the whole process is automatic.

You can Create multiple feeds. Just click the request new feed button. You can also Delete or Edit a feed. You must click the Manage feed button at the upper right of the sold listing page.
After your request, you can also decide not to show the feed on a selected property (it is not visible at the front). However, if you want to promote sold listings, you can use indexes, modules, and widgets.

Sold Listing Page
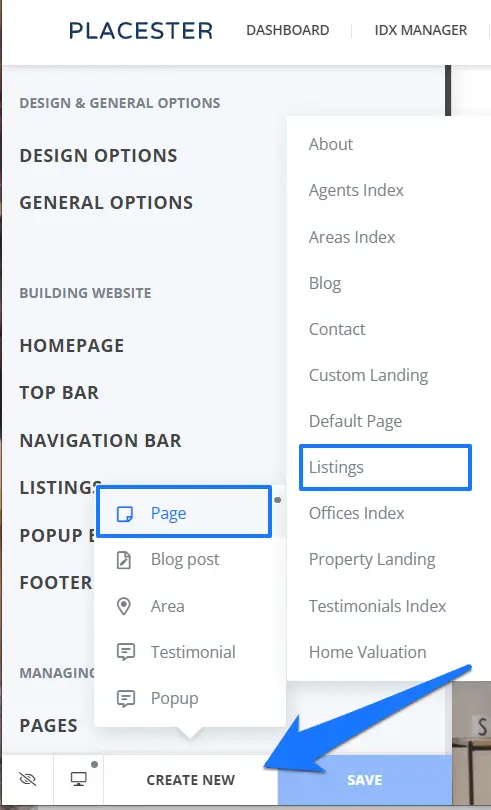
To create your sold listing page, click the Create button > Page> Listings at the bottom of your customizer.
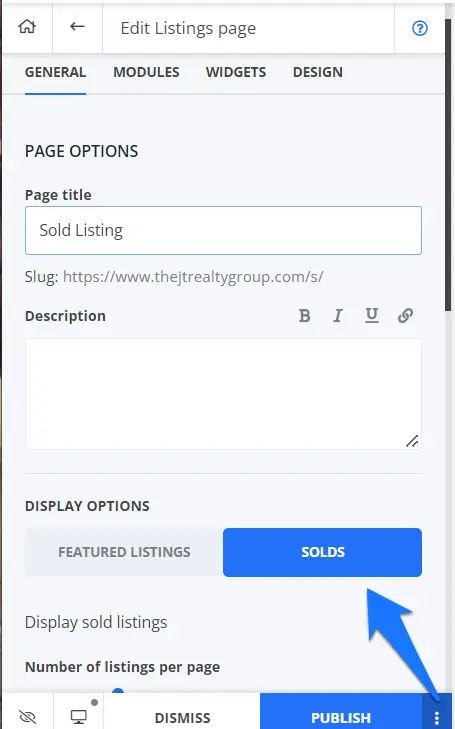
First, you must add the page title and description on the Listing page. You have two display options: Featured listings and Sold listings. Just choose and click Solds, and your sold listings will be added to the page accordingly.
This is how sold listings will look like, and each one of them is clickable and has its own sold property detail page.
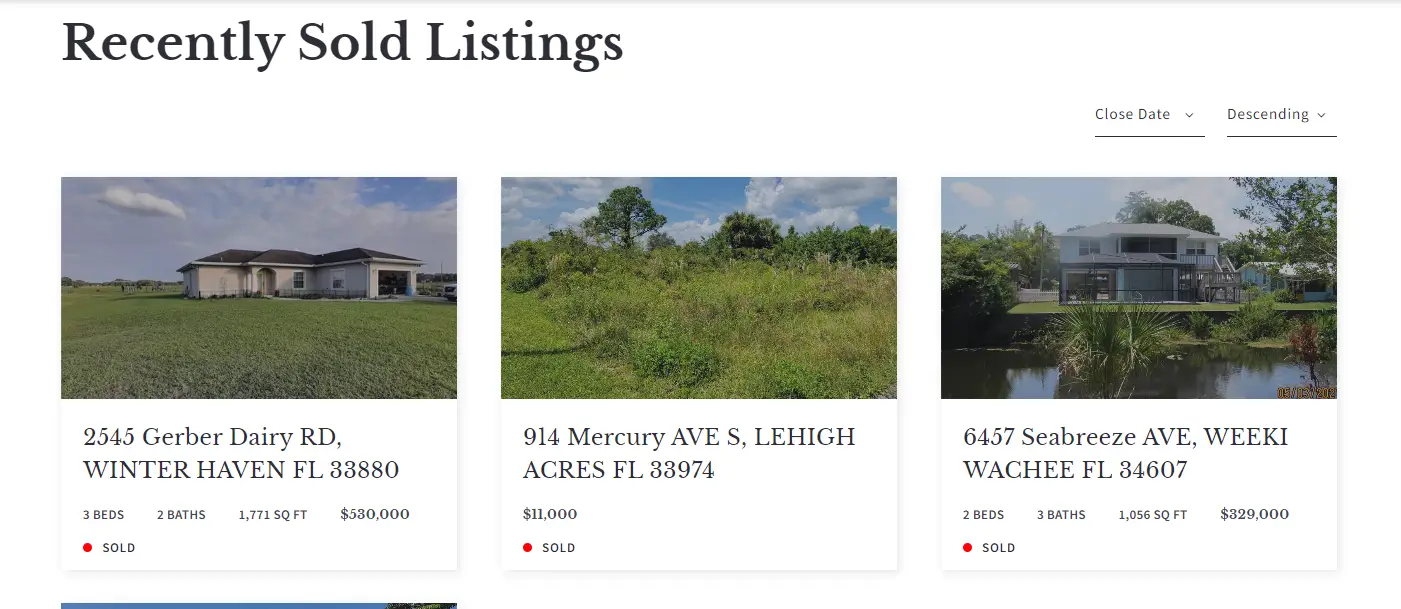
Listing images, details, and information came from the MLS data feed and can’t be modified, changed, or updated.
Like other page templates, you can control the number of listings to show per page, change button labels and colors, add widgets and modules, or change the page design.
Start using the Placester app to request listings directly
If you already have a Placester website:
- Go to Playstore/AppStore.
- Download Placester App.
- Log into your Placester Account.
- Enjoy full synchronization with in-platform data.
If you don’t have a Placester account:
No worries. We will get you up and running! Let’s build the website of your dreams! Start a 30-day free trial (no credit card required) or Book a DEMO to schedule a meeting with one of our experts and get a walk-through of our sites.


