")


")


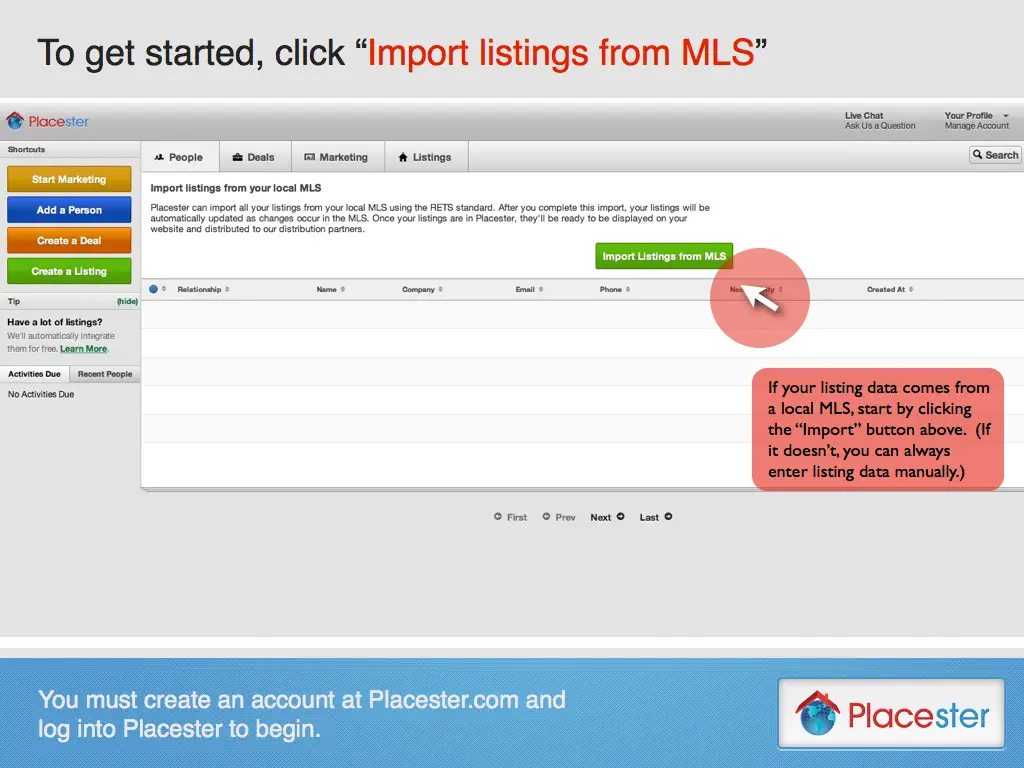
Adding MLS Listings via IDX
Step 1
From the “Listings” tab on your Placester Dashboard, click on “Import Listings from MLS.”
Step 2
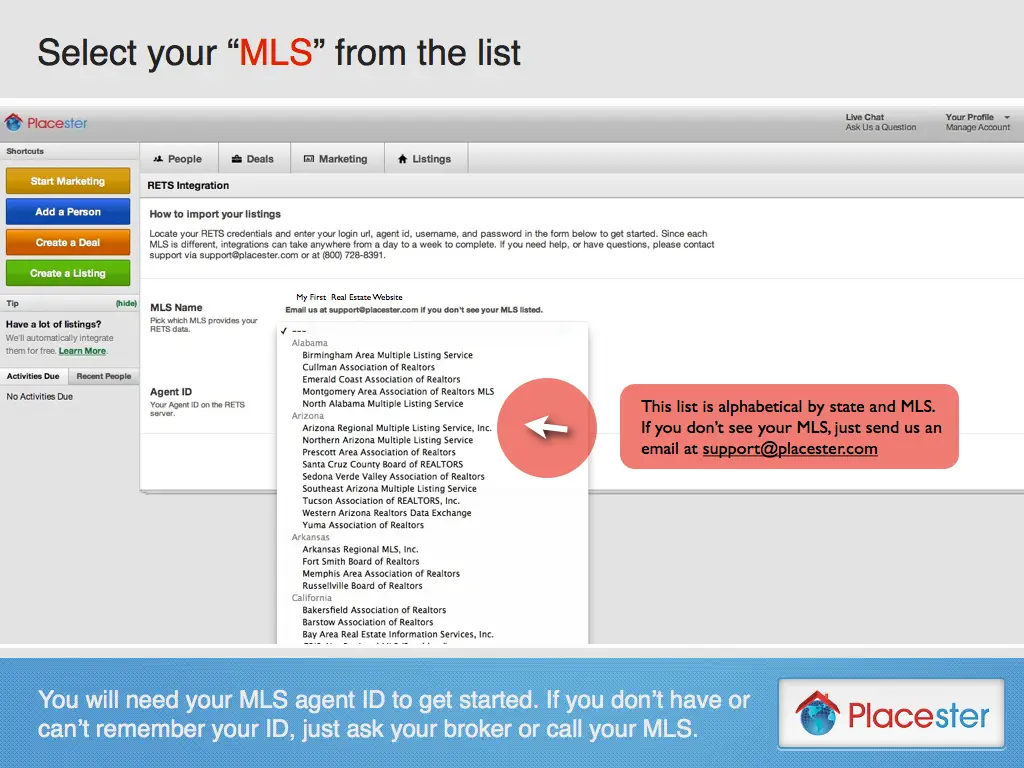
Select your MLS from the list provided.
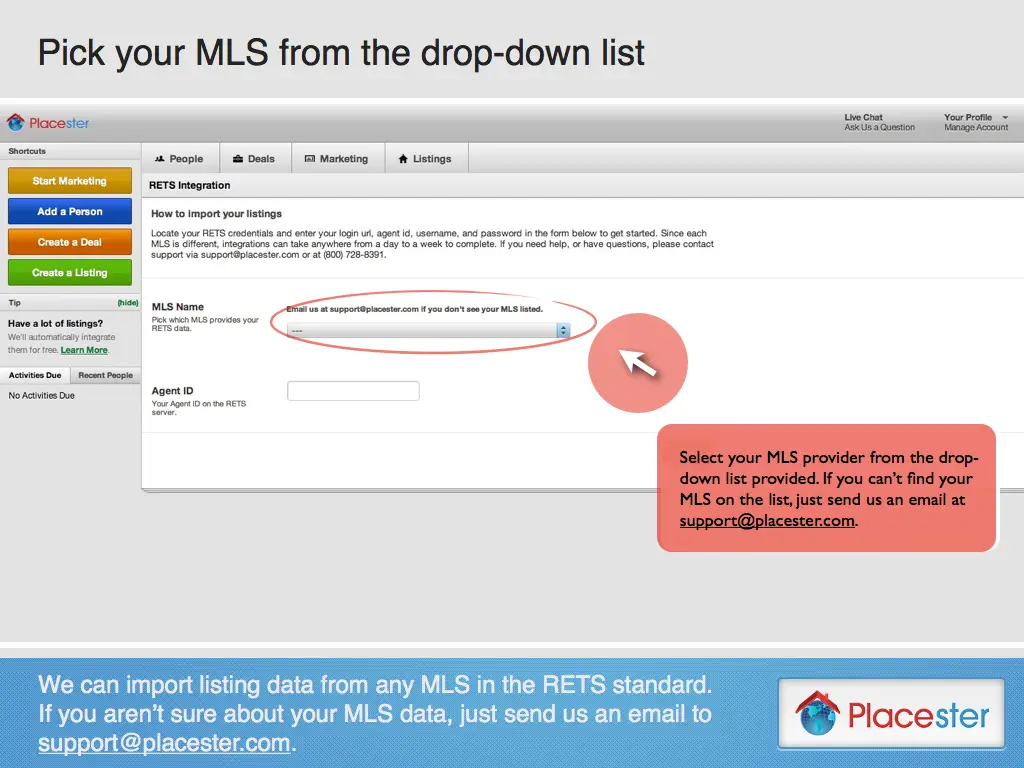
MLSs are organized by name and state of origin.
Step 3
Enter the Agent ID you use to access your MLS data.

Step 4
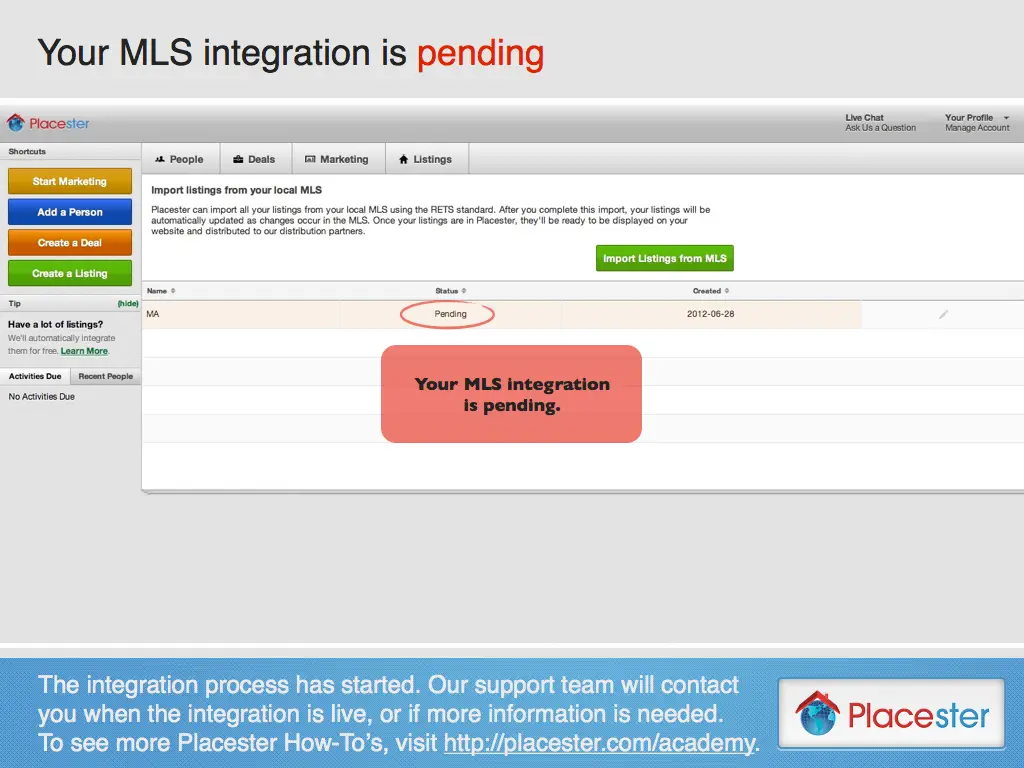
Finally, click the “Create” button to start the integration process.
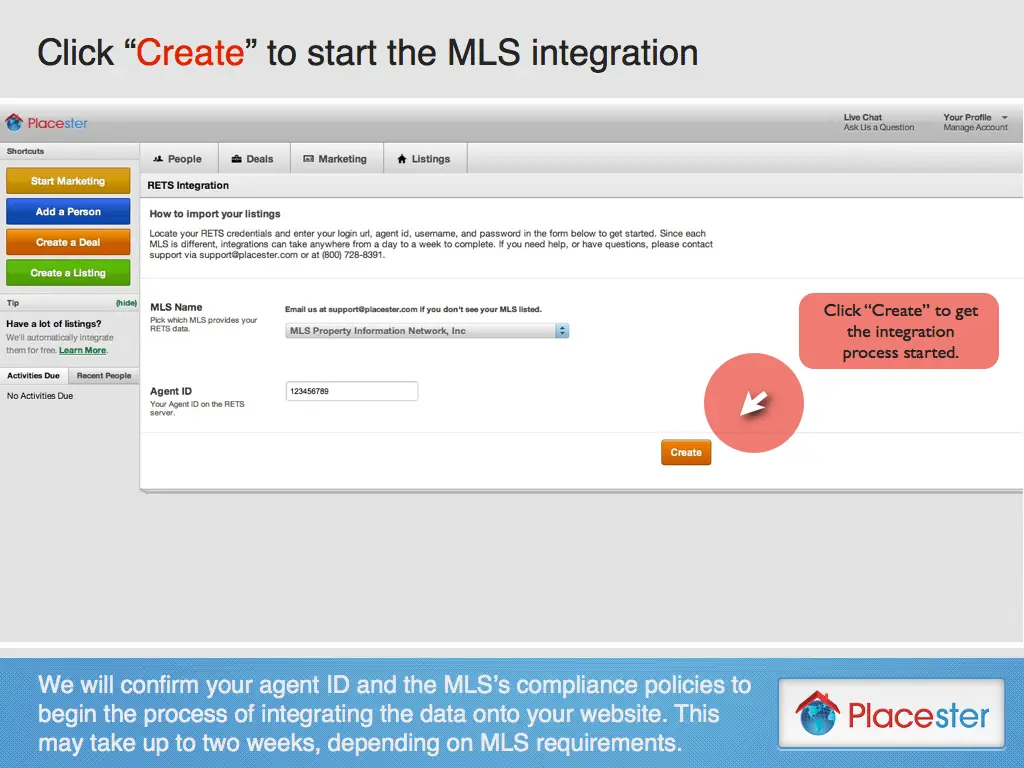
Please note that since each MLS is different, integrations can take anywhere from a day to a week to complete. Once your listings have been integrated, you should review them to makes sure all the information is accurate and correctly formatted.
![]()

The ultimate 2024 guide to building a real estate website
Get your FREE copy now!